
The most effective method to introduce SODIMM PC memory be this in your PC, scratch pad, sub-note pad or netbook (as these all apply here).
Is this for me?
There is many times a misleading misinterpretation among the public that introducing PC is something just a genuine qualified proficient ought to do. I think it is critical to at long last allow this deep rooted fantasy to rest. While the facts really confirm that most parts of in fact testing a PC an equipment viewpoint are troublesome, hence something a standard PC client shouldn't endeavor, overhauling PC isn't one of them. The last option is really a genuinely simple interaction to follow, and surely one that can be performed by far most of PC clients giving they heed some basic yet valuable guidance.
The fundamental apparatuses or potentially parts and different contemplations
Before you can endeavor introducing another PC memory redesign you want to set up certain devices and parts as well as pick a proper spot to do the methodology. I will expect you as of now have a PC bound for a redesign.
The most significant obviously is that you have bought another viable PC memory update and consequently are in control of these PC memory modules. Should this not be the case you ought to buy this from a wellspring of your decision and once done return to this article.
Besides, you will require a little Philips head screwdriver. These typically come in sets of six or so of fluctuated sizes, there is a high opportunity you currently own these some place in your carport as well as Do-It-Yourself tool stash. Thirdly, it is best that you have an enemy of static wristband. This is on the grounds that PC is delicate to static harm. You can buy this inexpensively on the web, essentially look for the term and it will be a simple, fast and modest purchase. If for reasons unknown you can't buy an enemy of static wristband find something made of metal around your home. This could be a metal light, a metal table leg or even a metal screwdriver. This will be utilized to release any static developed inside your body, just to take no chances and forestall harming your PC modules.
Fourthly, you might wish to set up a piece of fabric on which to later rest your PC to forestall scratching its surface. This is discretionary however considering that the vast majority will like to keep their PC in supreme condition it merits a notice.
When you have all the above pause for a minute to ponder where (for example what room) in your home (etc.) you can complete the overhaul method. It is suggested this room has a hard surface on which to rest your PC, a decent light source, a method for you to plunk down serenely and furthermore some place that is liberated from wet or residue, or some other ecologically unsafe event.
The overall method
Updating SODIMM PC is very basic and on the off chance that you persuade yourself to have a go, you will soon reasonable become a supporter of this conviction.
Having every one of the above named parts, apparatuses, and area prepared, the primary thing to do is to find the PC narrows cover on your PC. Most PCs this on the underside so turn it over (this is where the previously mentioned piece of material might prove to be useful) and examine. Present day PCs have a couple of sounds on the underside, one of which will hold the PC modules. Either unscrew every individual one to find this out the manual way, or counsel your PC's client manual for a speedy piece of information.
- https://colab.research.google.com/drive/1oogZhk58lBTGkMTqIcdBJuS-7WpkHlfj
- https://colab.research.google.com/drive/1Tpk6LcKCoJc6AS-Uc76Kz0AsuLylI6rl
- https://colab.research.google.com/drive/12GfbFotEqSKuWgEYzhVsm55DwGpOuh5p
- https://colab.research.google.com/drive/1wT1xu4ldjFQjXTLeGrq8OJRCaMm-qHJi
- https://colab.research.google.com/drive/1umVPHRQdiVfhfZ0mZIbgPLwYRyOvhuPS
- https://colab.research.google.com/drive/1bDt-L4-Dnb45WBcynSYkk9Ol9UE0sQO6
- https://colab.research.google.com/drive/1dzC8TZXPR9Cf8P2olDQx5H53XtN0WaVl
- https://colab.research.google.com/drive/1Vrvz3KbNXA9-7lTRK1ESCXirxSF2o-0q
- https://colab.research.google.com/drive/1nETN-MN_X9BSpdmxMji6nRfvFrsAFKZ3
- https://colab.research.google.com/drive/1IDr3lNiAhpp-GCJuIgR5YgGVzcuJi81R
- https://colab.research.google.com/drive/1dea5Kx8N2IgSQgph0b9KpcKapAxNuJ9t
- https://colab.research.google.com/drive/1iatwizwT0FZPn_oqa09TY_chuCxZwPvh
- https://colab.research.google.com/drive/1jRieRKw0M8-sUgvEuFac1ajifI9TKORO
- https://colab.research.google.com/drive/1L9NDwsepnSzIZK4bgghPMxFwPFCOfrvH
- https://colab.research.google.com/drive/1hvBfwClSsLp0Fm7qsCgWlz2aHGqf_6Lj
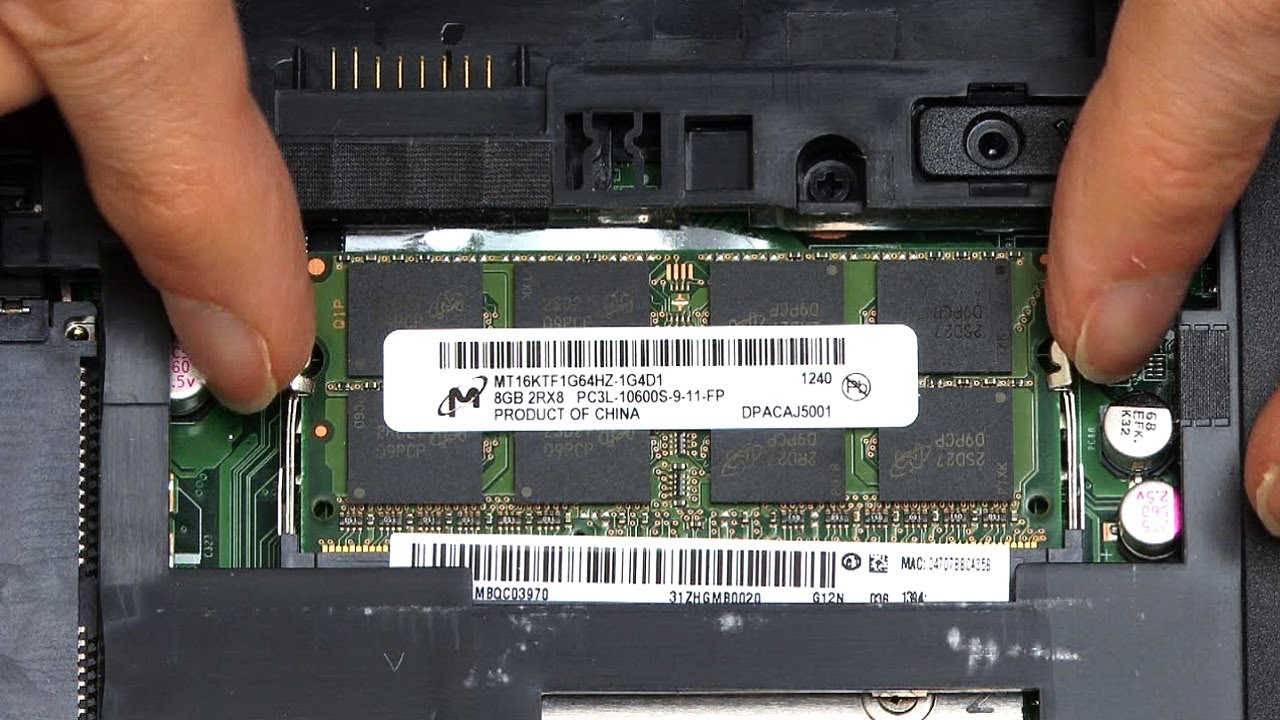
When inside you will either see at least one empty spaces in which to embed your PC memory redesign or all openings full. Contingent upon the result, you might have to initially extricate at least one existing PC modules. You can do this by pulling in an outwards heading on the clasps situated at one or the other side of every module. When done, these will make the comparing PC module discharge prepared for you to get and pull out. Recollect that prior to contacting it you ought to either be wearing an enemy of static wristband, or you ought to contact something made of metal that is earthed - in the two cases to release your body of any static.
Then, unload your new PC memory update and addition every module individually (would it be a good idea for you have mutiple) into the memory openings. Do take note of the hook situation on the PC module itself. Make certain to adjust it to the memory space. Embed the module at a point of around 45 degrees until the pins (typically gold plated) are scarcely apparent. Presently push down on the module until it cuts into place. You will hear this occur, after which the PC module will be safely introduced.
Rehash the above cycle for the quantity of modules your new PC memory update contains. You might have to alter the above system marginally depending on the off chance that your PC requires introducing modules two by two (for example in extremely old PCs or fresher PCs that help double channel activity).
After you have effectively followed the above establishment, supplant the PC narrows cover in its legitimate spot and screw it back utilizing the equivalent screw(s) it was held in initially.
To wrap things up, turn your PC the correct far up and turn the power on. You can either go into its Profiles to check whether the new PC is recognized (this typically requires you press a key, for example, Del, F2, F12 and so on relying upon the kind of Profiles following driving it on) or hold on until the Working Framework loads. In the event that you don't see the normal measure of actual memory introduced, make certain to check whether you completely embedded the PC modules. Assuming for instance one is somewhat free, its ability won't be distinguished. In uncommon cases you have been conveyed memory that is flawed, also called DOA (Done for).
In outline
Make certain to extricate the main characteristics of the above data. The normally heard suspicion that introducing SODIMM PC is something just a genuine qualified proficient ought to perform is a legend. The truth is that you can carry out this methodology yourself and hence set aside cash and time. The main restricting element to the above is to initially ensure you have every one of the important parts, instruments and to wrap things up proper area to do as such. You ought to likewise make sure to ground yourself to forestall any conceivable static harm to the PC modules themselves. Do this either by wearing an enemy of static wristband or consistently contacting something made of metal that is earthed.
Most importantly don't turn into a casualty of different PC administrations outlets that attempt and talk you into the intricacy of this methodology and as is exceptionally helpful for them, charge you a powerful premium for their administration.


0 Comments